
Alex's 2005 Sprinter Conversion - AKA: The Glowing Japanese Apartment...
Alex bought a used Sprinter and we started the conversation about his wants and needs, then we refined that list to keep the budget from blowing out with stuff he likely just didn't need...He had a long look at how the similar Sprinter I did for Joe and Gina turned out and figured I was the guy to do the work..
Alex is a San Francisco resident who works as a nurse at a hospital about a half hour away...His job requires him to be on close call some days...He get's a per diem for that...Instead of continuing to stay in hotels, he bought the van for a bit more than what the yearly per diem is...So the van will be his hang out while on call...Of course he'll use it for adventures from the beaches, to the mountains...
The design is similar to two other Sprinter's I've converted...My basic design is to create a very nice steel tent...Not every bell and whistle, just simple and functional...
The conversion took place at my shop in Olympia, Washington, USA and took about a month...The cost was about $7,000 total...
The cabinet cases are plywood, the drawer faces are pine, the pulls and latches are walnut...The ceiling is cork, the floor is bamboo..
Full details are here: http://www.expeditionportal.com/forum/threads/116140-2005-118-quot-S printer-Conversion-for-Alexander
(above) All done...I know I skipped some finishing details but the job ran longer than expected and Alex will get it in a day...So I had the camera on the bench and focused on finishing...To see the full build process, go here:.http://www.expeditionportal.com/forum/threads/116140-2005-118-quot-Sprinter-Conversion-for-Alexander

(above) The final tour starts here...Driver side rear door...Hooks, panels, tables, pulls, and more...

(above) The twin...

(above) One change...Window slide bolt is now the default hold up for the table...

(above) The hole compartments in the door got the black floor runner treatment...

(above) Welcome to the party...It just needs stocking and a friendly crew...

(above) New is the SS bike chain loop into the cabinet, everything else is just finished finer than before...

(above) Looks easy to clean...

(above) Slider door view...There are bungee cord loops at the lower cabinets...
Keeps stuff from sliding on a slidy floor...Reason # 2 bamboo wouldn't be my first choice...

(above) Who want's in...???...

(above) I squared out this corner to offer more floor space on a limited floorplan...There are tie-in loops there too...
The speakers down low are Polk 6.5"...The black stuff is ribbed vinyl runner from a Big Box Store...
The bamboo edges are channeled or L metal covered...Screws and epoxy hold them on...

(above) Looking back from the Driver seat...It's deceiving from the outside how spacious it is inside...

(above) Wall is sliced 2x4, multiple coats of straight gloss...Impossible to finish perfectly, but I gave it my best shot...Table top too...
The window sash pulls are for tie-ons...The flush loops on the cabinet top are if you want to loop and lash something to the wall...

(above) Over there is the kitchen...

(above) Simple, works...

(above) Water tank...

(above) Cork lined shelves...

(above) These curtains, the brown ones with the rings that are just wrong...Slide badly and obscure the lighting...

(above) Red and warm white strip LED lighting...Switched separately...Cork on the lid...The automatic fan is a cute gizmo...In my climate a vent/skylight makes more sense...For heat exhaustion a fan seems like an idea worth trying...

(above) A straight bungee is over the slider door for drying a towel, hanging a curtain or maybe a bug screen...Options exist...

(above) All that, is in there...???..
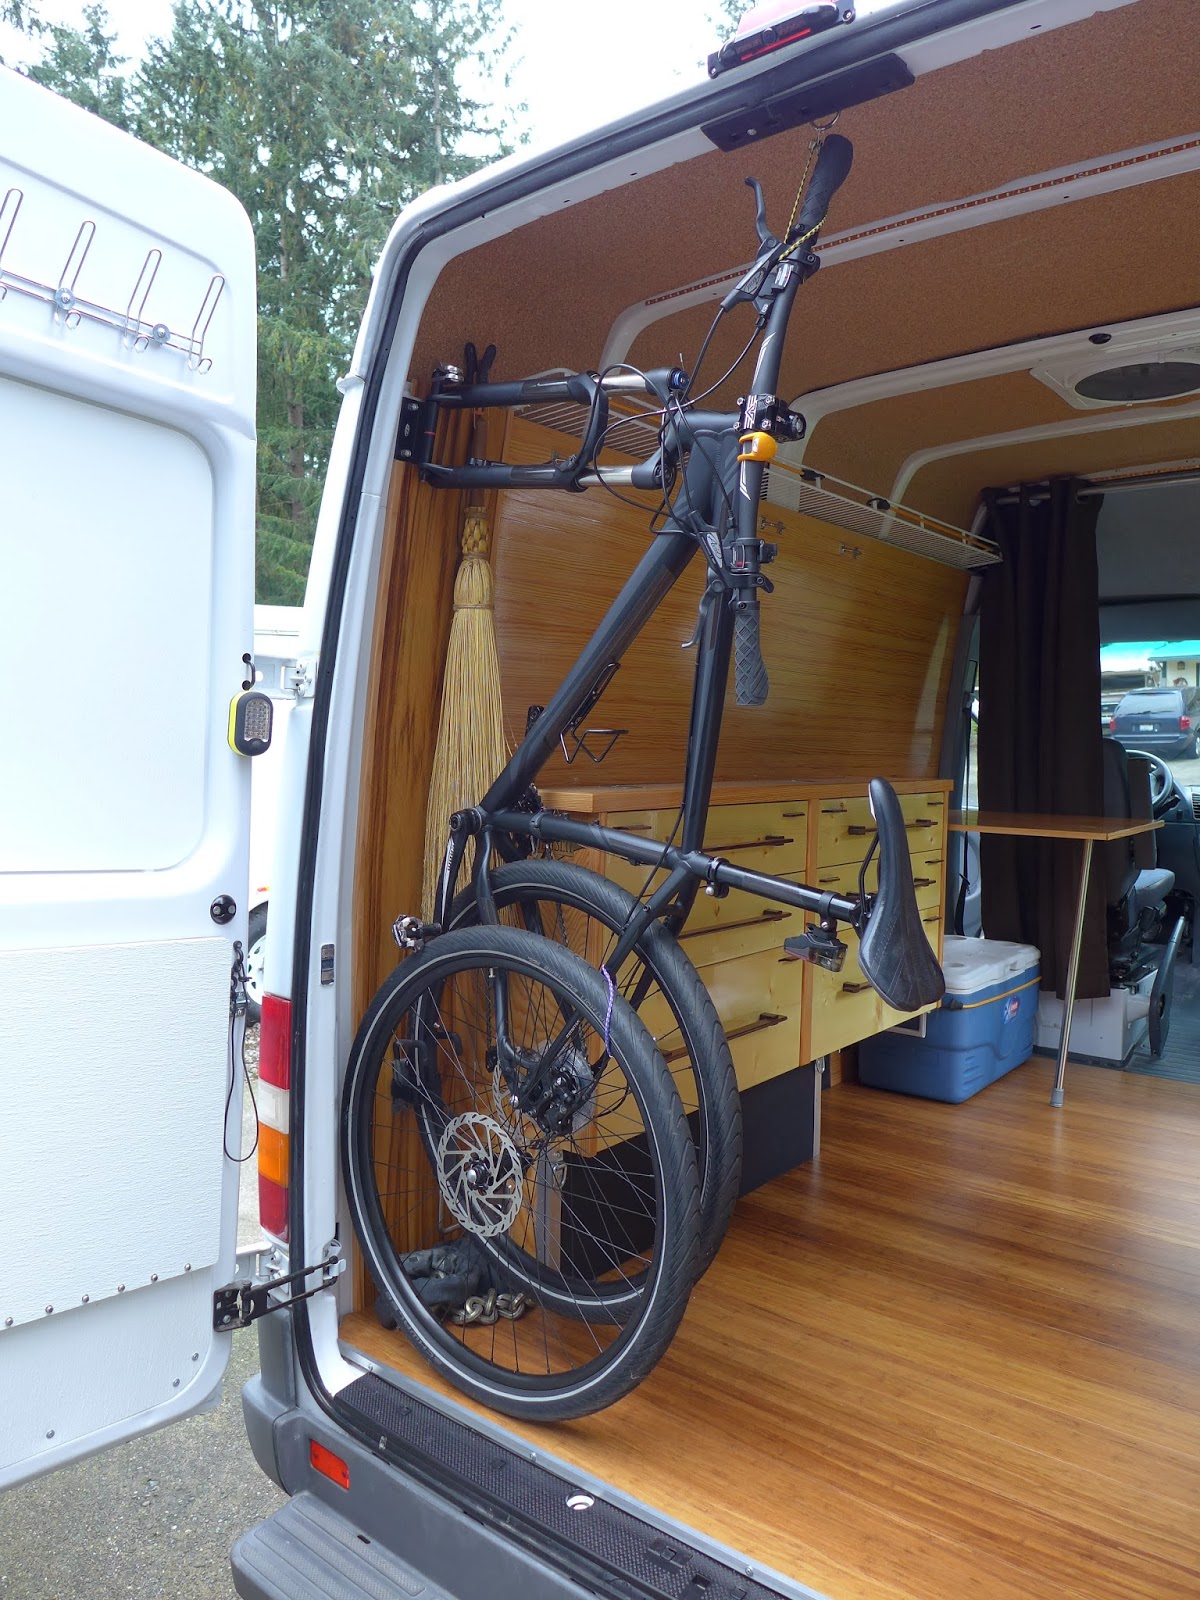
(above) Oh yeah, the bike goes there...

(above) A cord from the bars to the ring keep it from swinging...

(above) Bring on the expedition...!!!...

(above) The black curtains slide way easier and full view of the lights is preserved...

(above) They knot up to keep them from breeze flapping...The bucket is for trash or for those, like my wife, who might need a nighttime potty break...Some say "eww' , Pam says "ahh"...It works for us...

(above) A full tank takes over five long minutes to drain...Plan accordingly...

(above) Clip on awning...

(above) 12 volt LED rope light...

(above) I'm telling you a 118" never seemed bigger...

(above)Imagine the possibilities...

(above) From the driver seat, this is how it looks...Custom boxes and a relocated 12 volt outlet...The tablet mount is bolted to the passenger side of the center console and the capture loop up front significantly stiffens up the aluminum flex arm...The tablet and radio are both Bluetooth...

(above) Yesterday Alex flew up from S.F. and I picked him up at SeaTac where he was reunited with his van...Back at my place he and I hung out all morning and half the afternoon...Great guy...

(above) I had everything out of the van so Alex has complete and uninfluenced placement of everything that goes in there...It's his blank canvas...It's important to do it that way...

(above) I have a set of those fold flat, folding chairs and one of them looks just right for the interior...It's Alex's now...

Before he left it was handshakes and hugs, then as he was rolling out the driveway it was "See you later"...Yeah...
To see the full build process, go ahere...http://www.expeditionportal.com/forum/threads/116140-2005-118-quot-Sprinter-Conversion-for-Alexander